
Free · runs in your browser

Fix underexposed video

Add exposure in real stops, recover shadow detail and keep highlights from clipping, with a histogram, a waveform and a split before and after. No upload.

Drop a dark video to brightenChoose a dark video

Or pick one from your computer. You’ll see it brightened before you save anything.Pick the clip that came out too dark from your photos or files.

Works with MP4MOVWebMMKVand more

Brightened on your device. The file is never uploaded.

To fix an underexposed clip, open it above, open More options and raise Exposure until the middle of the Histogram sits where it should, usually by the number of stops the shot was under. Then lift Shadows a little, pull Highlights back if lamps or sky start to flatten, and check with Before and after. Auto brighten does the same calculation for you if you’d rather start from a suggestion.

Exposure here is a genuine gain in linear light: +1 EV doubles the light in every pixel, the way opening the aperture by one stop would have. That matters because it keeps the ratios between areas intact, so a face and the wall behind it stay in the same relationship they had on set. Values pushed past white are rolled into it on a smooth shoulder rather than chopped off.
How to correct an underexposed clip

These steps use the pro controls. For a one-click result, press Auto brighten and adjust Strength instead.

  1. Open the clip and pause on a typical frame

    Choose Select video, then press Space and scrub to a frame that represents the shot, ideally one with a face or a mid-grey surface in it.

  2. Read the histogram

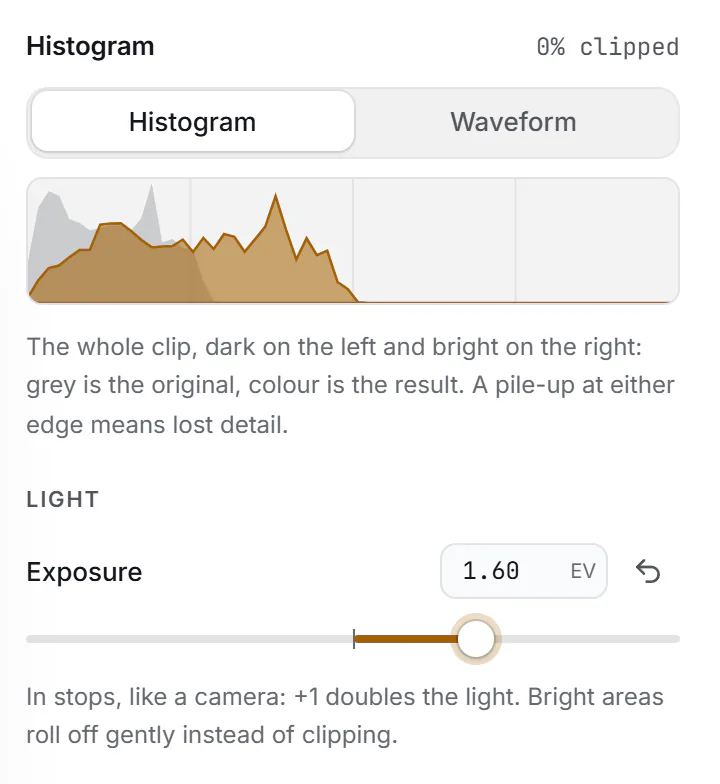
    Open More options. The Histogram shows the whole clip, dark on the left and bright on the right, with the original in grey. An underexposed clip piles up in the left third.

  3. Add exposure

    Drag Exposure or type a value in its box: start with the stops you think you were under (+1, +1.5). The coloured histogram moves right as you go.

  4. Shape the tones

    Raise Shadows for detail in the darkest quarter, lower Highlights if bright areas lose texture, set Blacks so the darkest areas are black rather than murky, and add a touch of Contrast.

  5. Deal with noise, compare, export

    Add Noise reduction if the lifted shadows crawl, check Before and after, then select Export video. Choose High quality under Export settings for the cleanest result.

Stops, EV and why linear light matters

A stop is a doubling or halving of light. A clip shot one stop under received half the light it needed; two stops under, a quarter. Because video files are gamma-encoded, doubling the light doesn’t mean doubling the numbers in the file: a mid grey that should sit near 46% of the code range lands around 34% one stop under and 25% two stops under. Simple “brightness” sliders that add or scale those coded values therefore over-lift shadows and under-lift midtones, which is why corrections made with them often look flat.

The Exposure control here decodes each value to linear light, multiplies it by 2 to the power of the EV you set, and encodes it again. The readout is in EV, so +1.00 is exactly one stop. When the gain would push bright pixels past white, a soft shoulder bends them in so that a lamp shade keeps its gradient instead of becoming a flat patch.

Reading the scopes

Histogram

The Histogram under More options is built from frames sampled across the whole clip, so it describes the shot rather than one moment. Grey shows the original, colour shows the result with your current settings. Small marks appear at the edges when a noticeable share of pixels is crushed to black or clipped to white, and the readout above it gives the clipped percentage.

Waveform

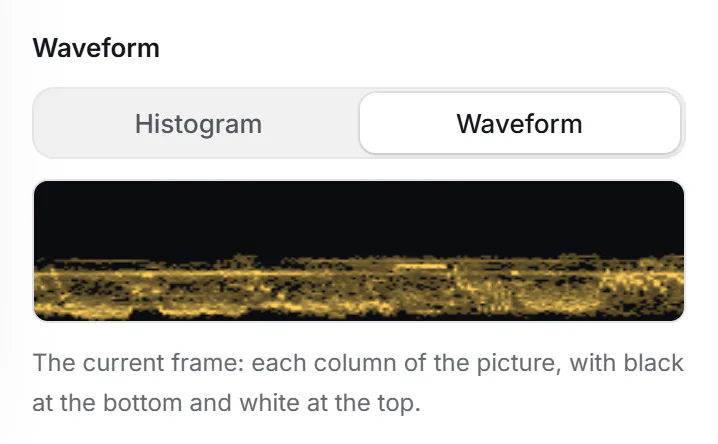
Switch to Waveform for the current frame. Each column of the picture becomes a column of the scope, with black at the bottom and white at the top, so you can see exactly which part of the frame is sitting where. A face that should be well exposed usually sits a little above the middle; if the trace for the face is in the bottom third, there’s room to add exposure.

The Histogram readout under More options: the original clip in grey bunched up on the left, the result in amber shifted to the right after setting Exposure to 1.60 EV, with "0% clipped" above it and the Exposure number field below (enlarge image)

Grey is the original, amber is the result. With Exposure at +1.60 EV the bulk of the clip moves right and nothing clips.

  1. Before (grey), after (amber)
  2. Exposure in EV
The Waveform readout of the current frame: a band of traces across the full width, with black at the bottom and white at the top (enlarge image)

Waveform shows the current frame column by column, black at the bottom and white at the top.

How far can you push it?

It depends on what the camera recorded. A 10-bit file or a good 8-bit camera file at a high bitrate can usually take one to two stops before problems show. Heavily compressed phone or messaging-app video breaks up sooner, because the encoder threw away fine shadow detail to save space and what remains are blocks and smears.

  • Noise grows with every stop. Use Noise reduction in moderation: too much makes skin waxy.
  • Banding appears in smooth gradients such as walls and skies, because an 8-bit file has few distinct levels in the shadows. Grain hides banding better than smoothing does, so go easy on noise reduction where you see bands.
  • Colour casts under artificial light become more obvious when lifted. Lowering Saturation a little can calm an orange tungsten cast.
  • Crushed areas stay crushed. Anything recorded as pure black has no detail to reveal.

Log, HDR and other special footage

Log footage (S-Log, V-Log, Apple Log and the like) looks dark and washed out on purpose: it needs a conversion LUT before any exposure decisions. Correct it in an editor with colour management rather than here. HDR phone clips are converted to a standard picture by your browser when they open, and the export is standard dynamic range; if you need to keep HDR, grade in an HDR-capable editor such as DaVinci Resolve or Premiere Pro.

A quick order of operations

  1. Exposure first, judged on the midtones (faces, grey surfaces), not on the brightest light in shot.
  2. Highlights down to keep detail in anything that has started to flatten.
  3. Shadows up if the darkest quarter still hides detail you need.
  4. Blacks to set a clean floor, Whites to set a clean top.
  5. Contrast, then Saturation or Vibrance to taste.
  6. Noise reduction last, at the lowest setting that hides the speckle.

Underexposure questions

How many stops can I recover from an underexposed video?

Typically one to two stops from decent camera footage before noise and banding become distracting, less from heavily compressed phone or messaging-app video. Use the Histogram and Before and after to judge where it stops looking good.

Is exposure the same as brightness?

No. Exposure multiplies the light (in linear light here), so ratios between areas are kept. Brightness shifts the coded levels evenly. Exposure is usually the more natural fix for underexposure.

Why does my footage look flat after adding exposure?

Lifting everything compresses the contrast you had. Move Blacks slightly to the left to restore a true black, and add some Contrast. Auto brighten does this for you.

Can I see the exact values I set?

Yes. Every control under More options has a number field you can type into, Exposure in EV to two decimal places, and its own reset button.

Does it work on 4K or 10-bit footage?

It opens whatever your browser can decode, including 4K. The grading runs in floating point on the GPU, but the export is an 8-bit H.264 (or WebM) file, which suits sharing rather than further grading.

Can I export at the original resolution and frame rate?

Yes. Under Export settings, leave Size on the first option, which is the clip’s own resolution. The frame timing follows the source.